Creating and managing register templates
The Registers feature empowers organizations to establish a secure and structured framework for employees to submit vital information pertaining to specific incidents. By utilizing customizable forms or templates, employees can efficiently provide the required details while ensuring data security. The feature incorporates a comprehensive status tracking mechanism, enabling administrators to monitor and manage entries with ease. Administrators have the authority to update and take necessary actions based on the status of each entry, ensuring prompt and appropriate handling of incidents within the organization.
Organisation setup
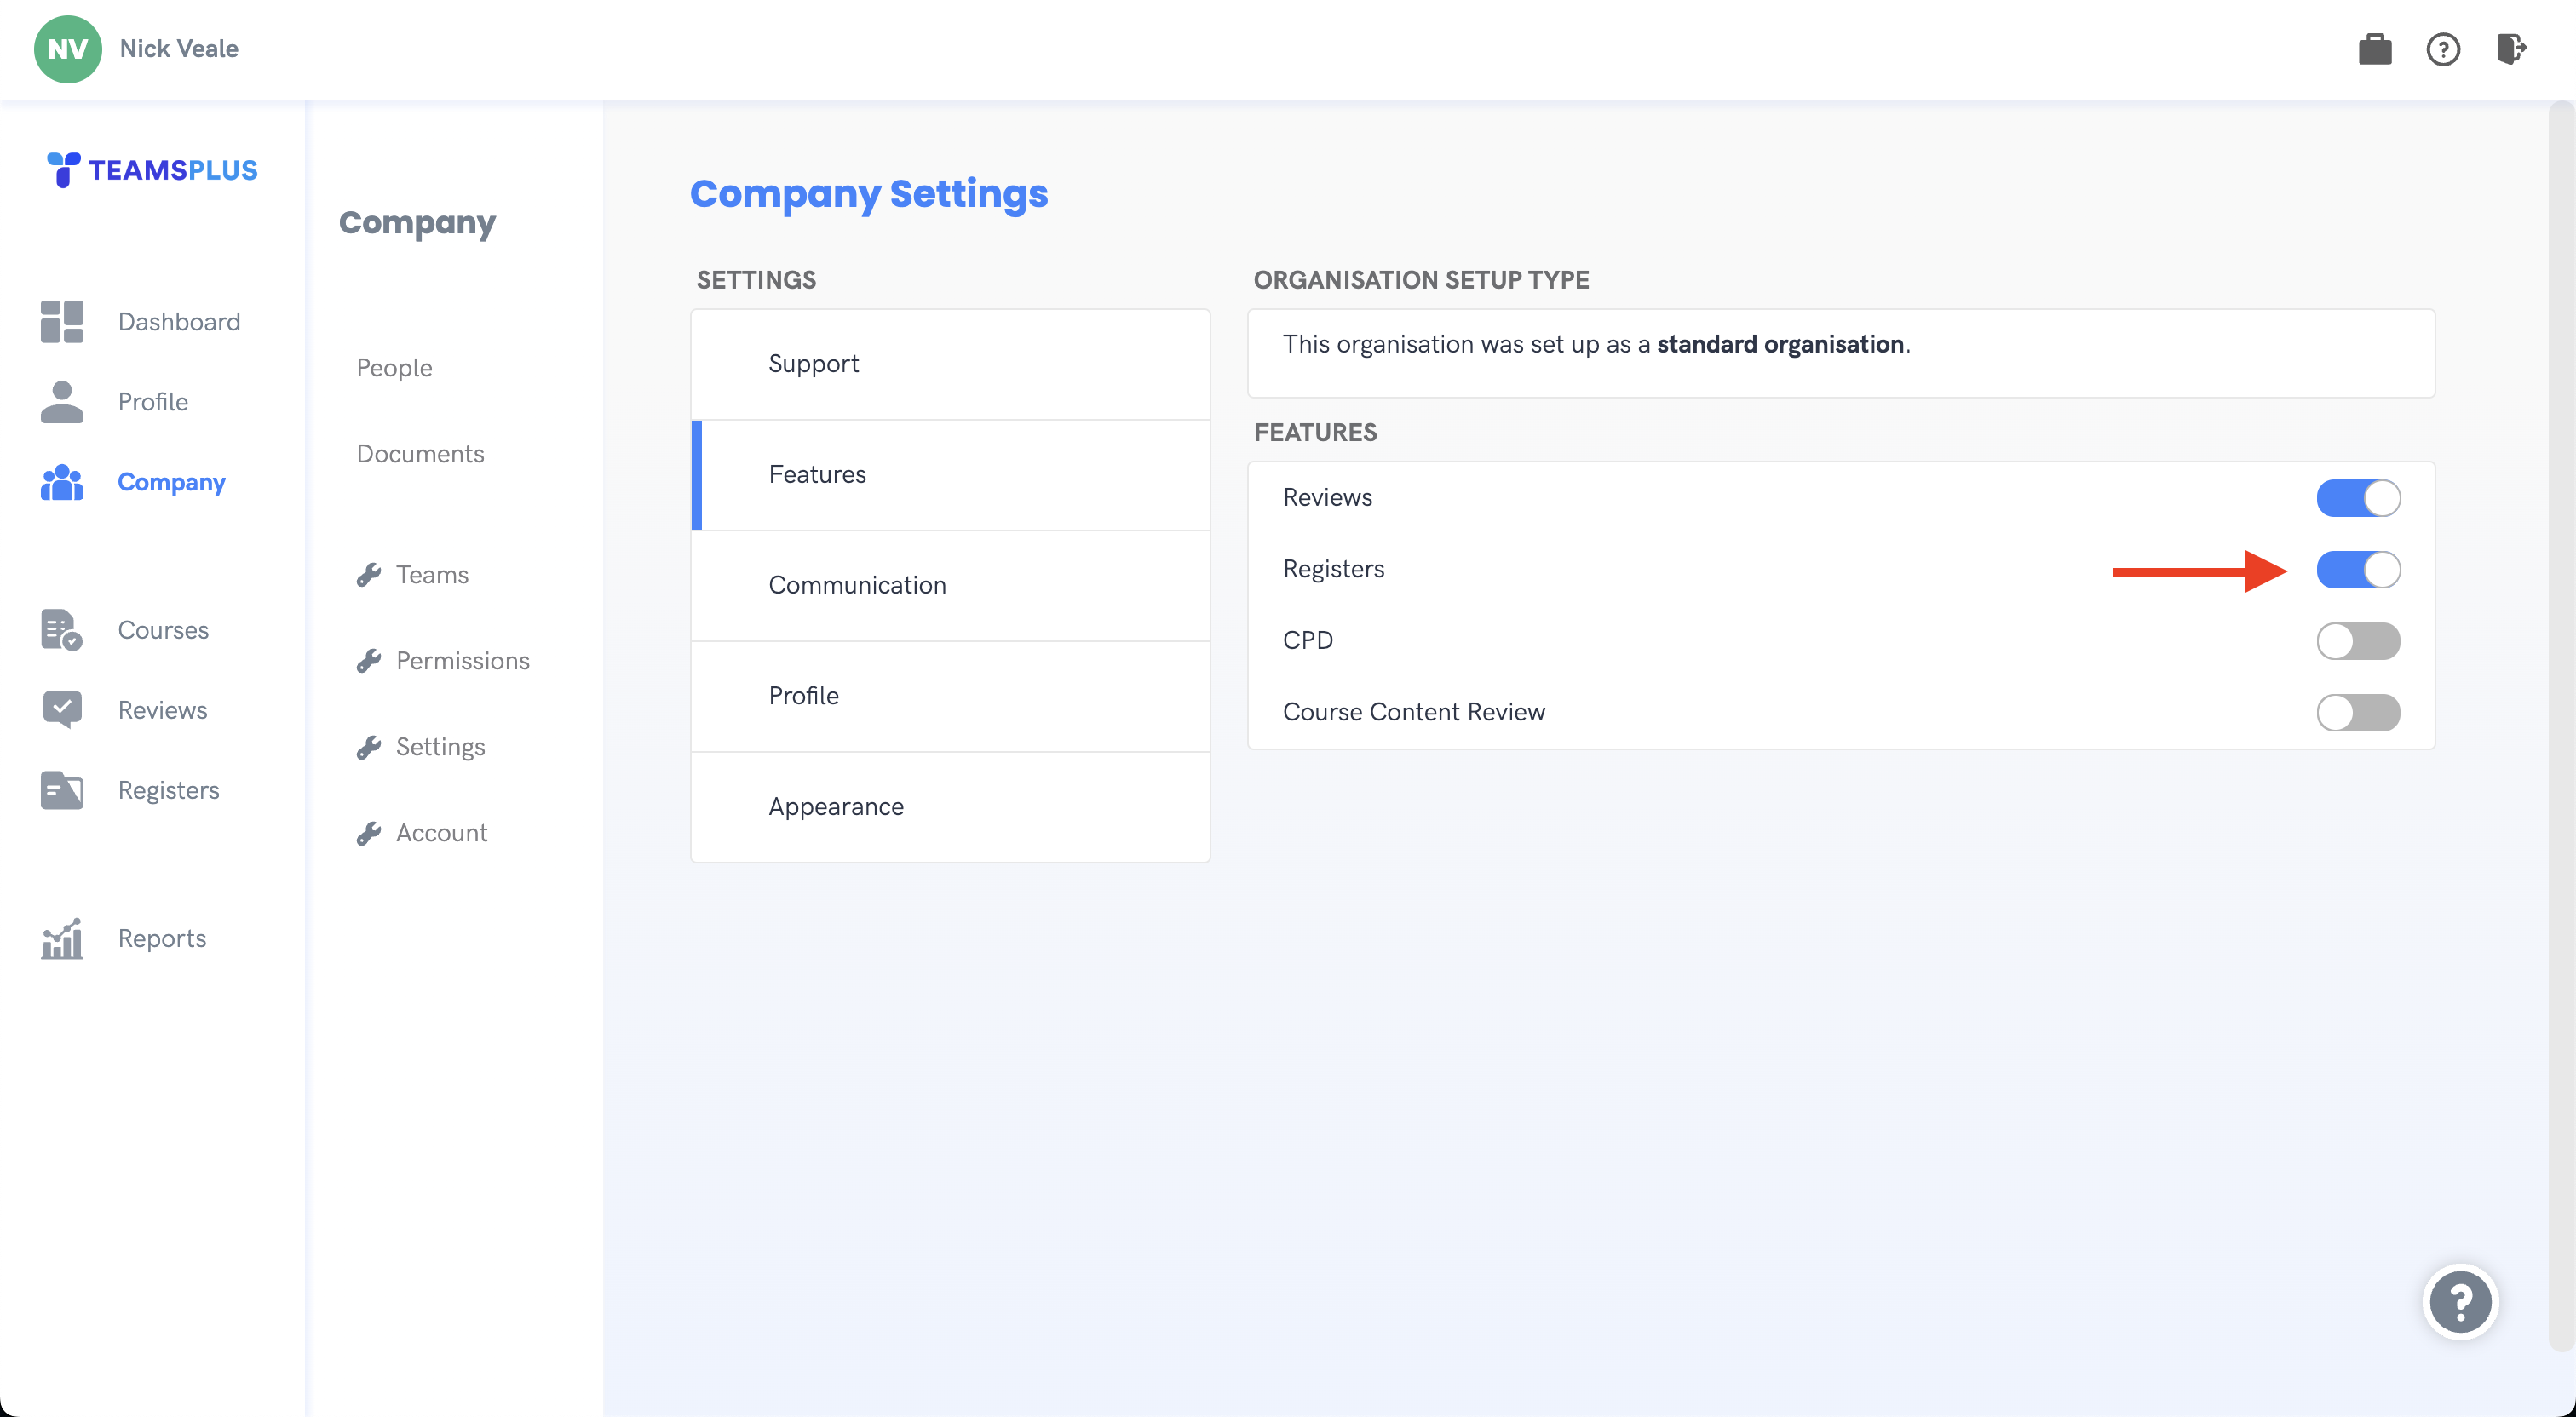
An Organisation must have the Registers feature activated before it can be utilized.
To check if your organisation has this feature activated, log in to Dacreed as a Super Admin and navigate to Company > Settings > Features to see if the 'Registers' toggle has been activated.
Administrator setup
Once an Organisation has the Registers Feature enabled, an administrator can now Create, Modify and Activate Registers for their organisation.
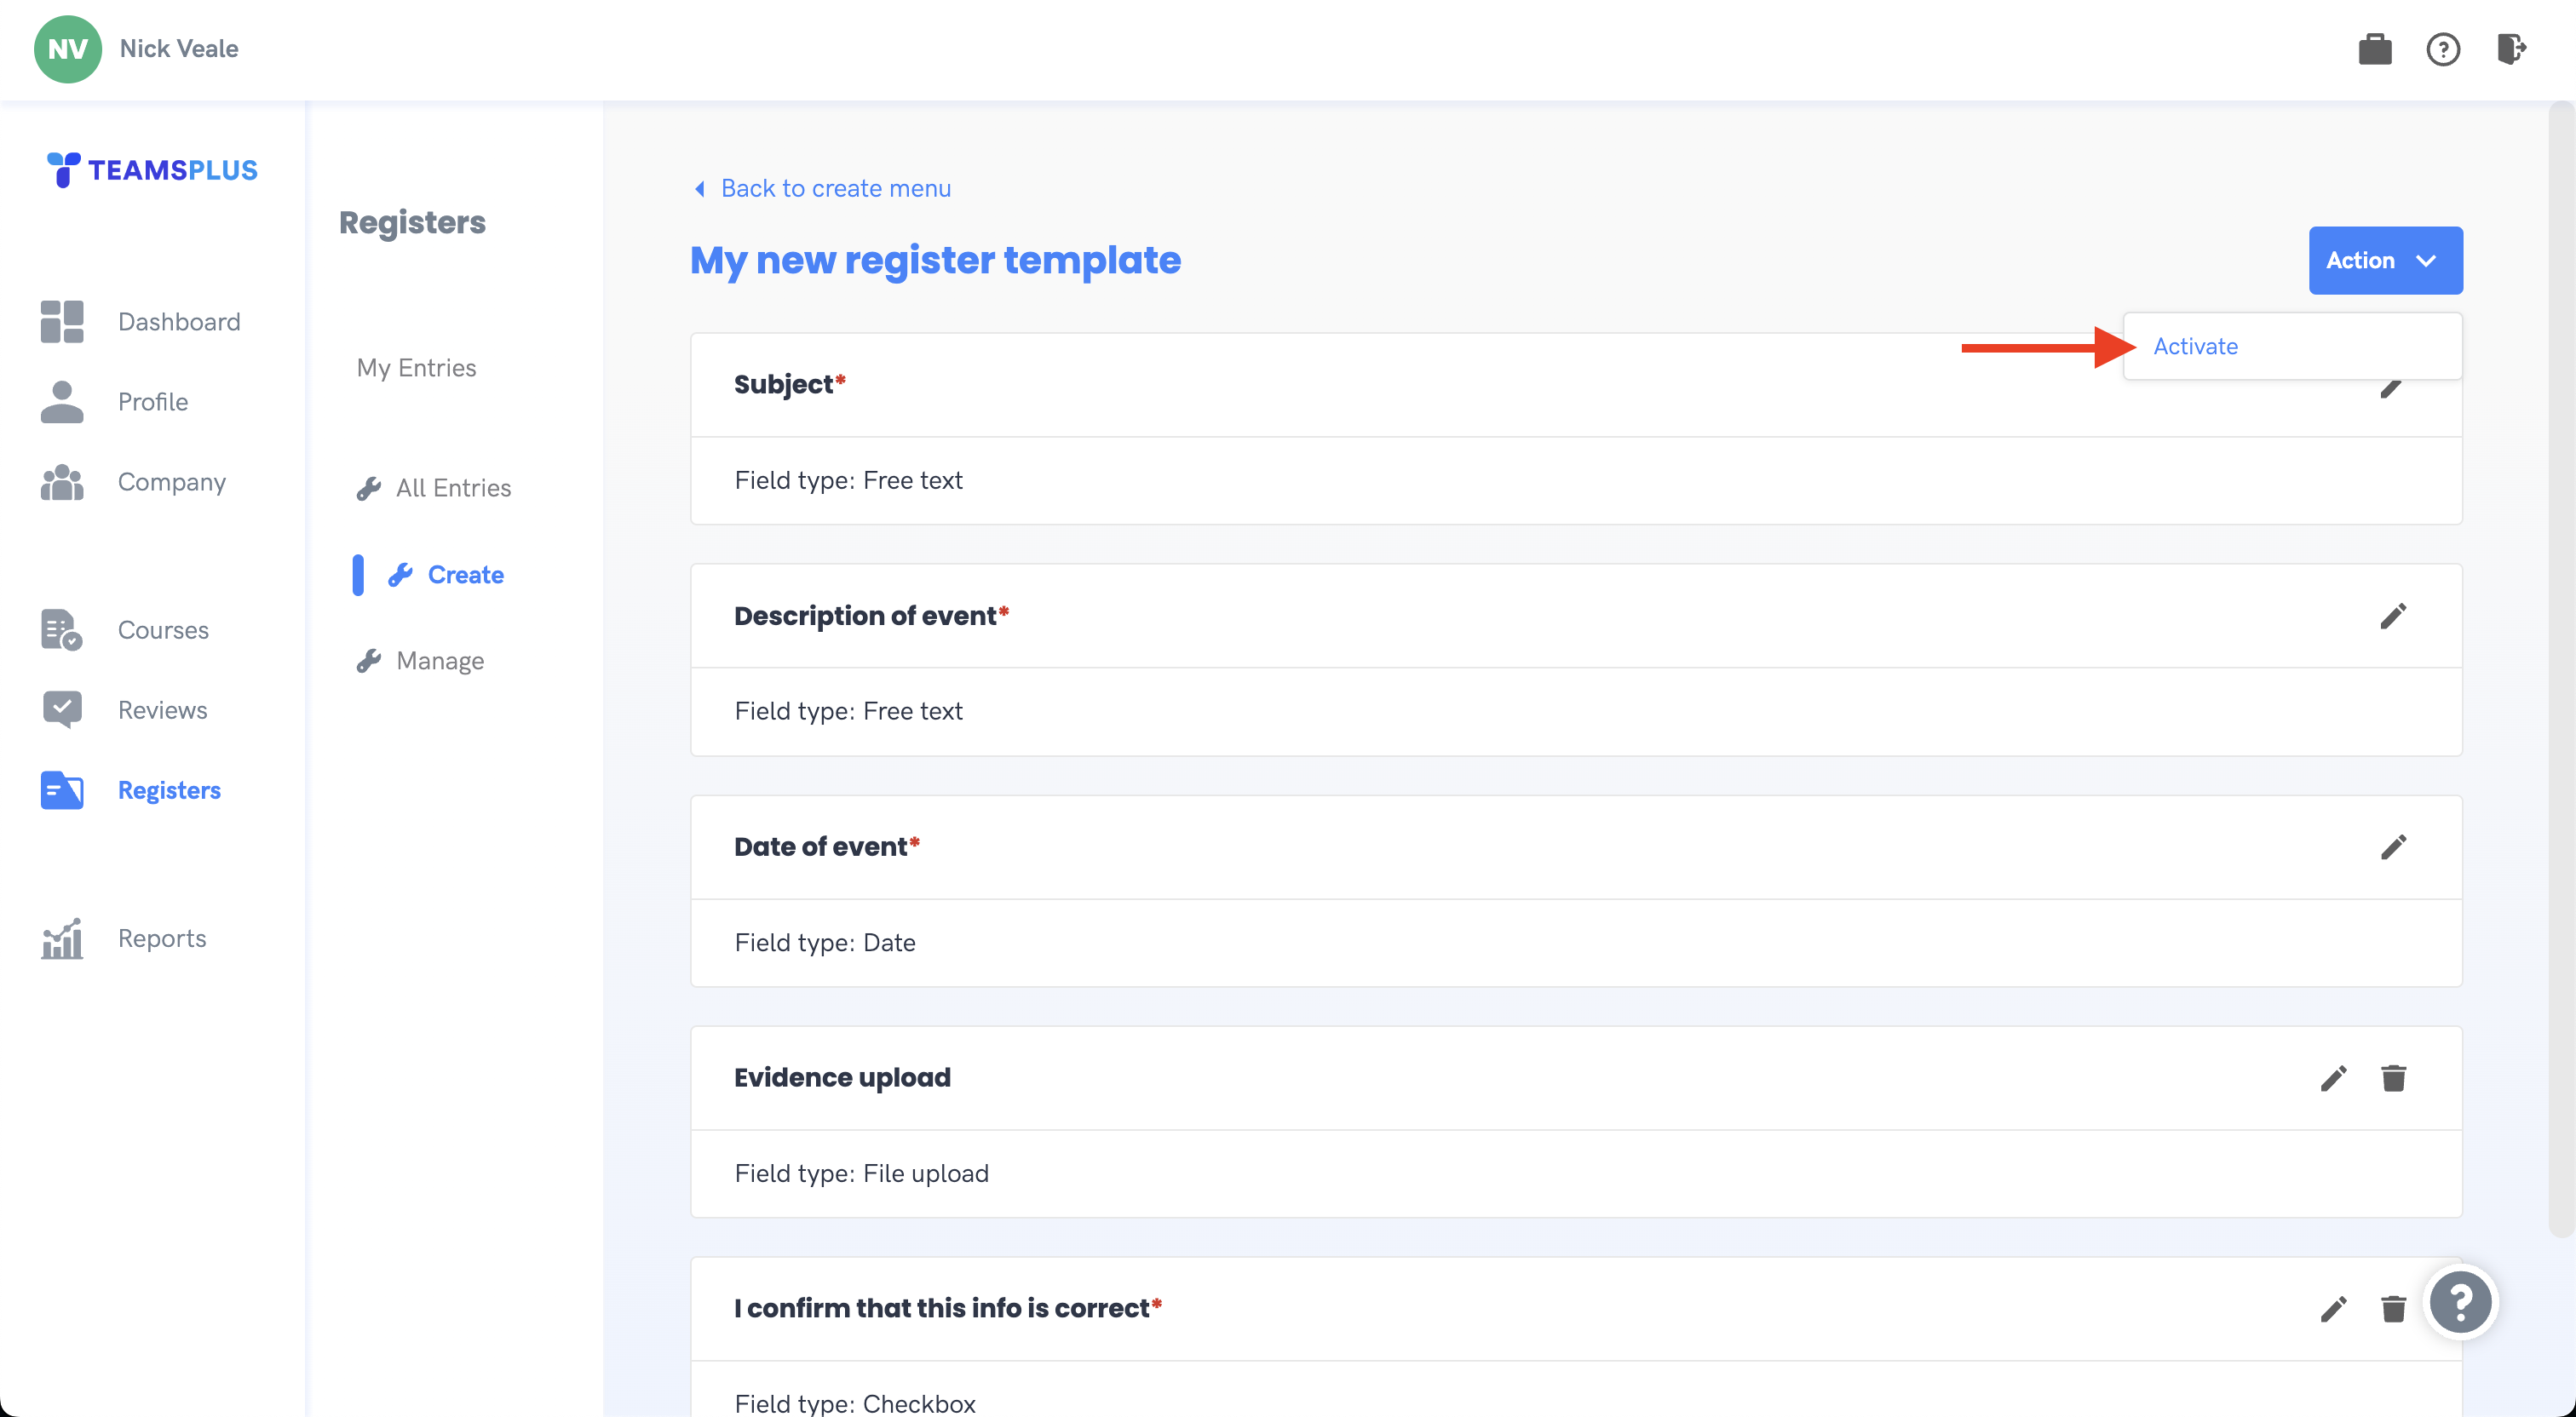
Begin by navigating to Registers > Create. Here we will create a register template for use on the platform.
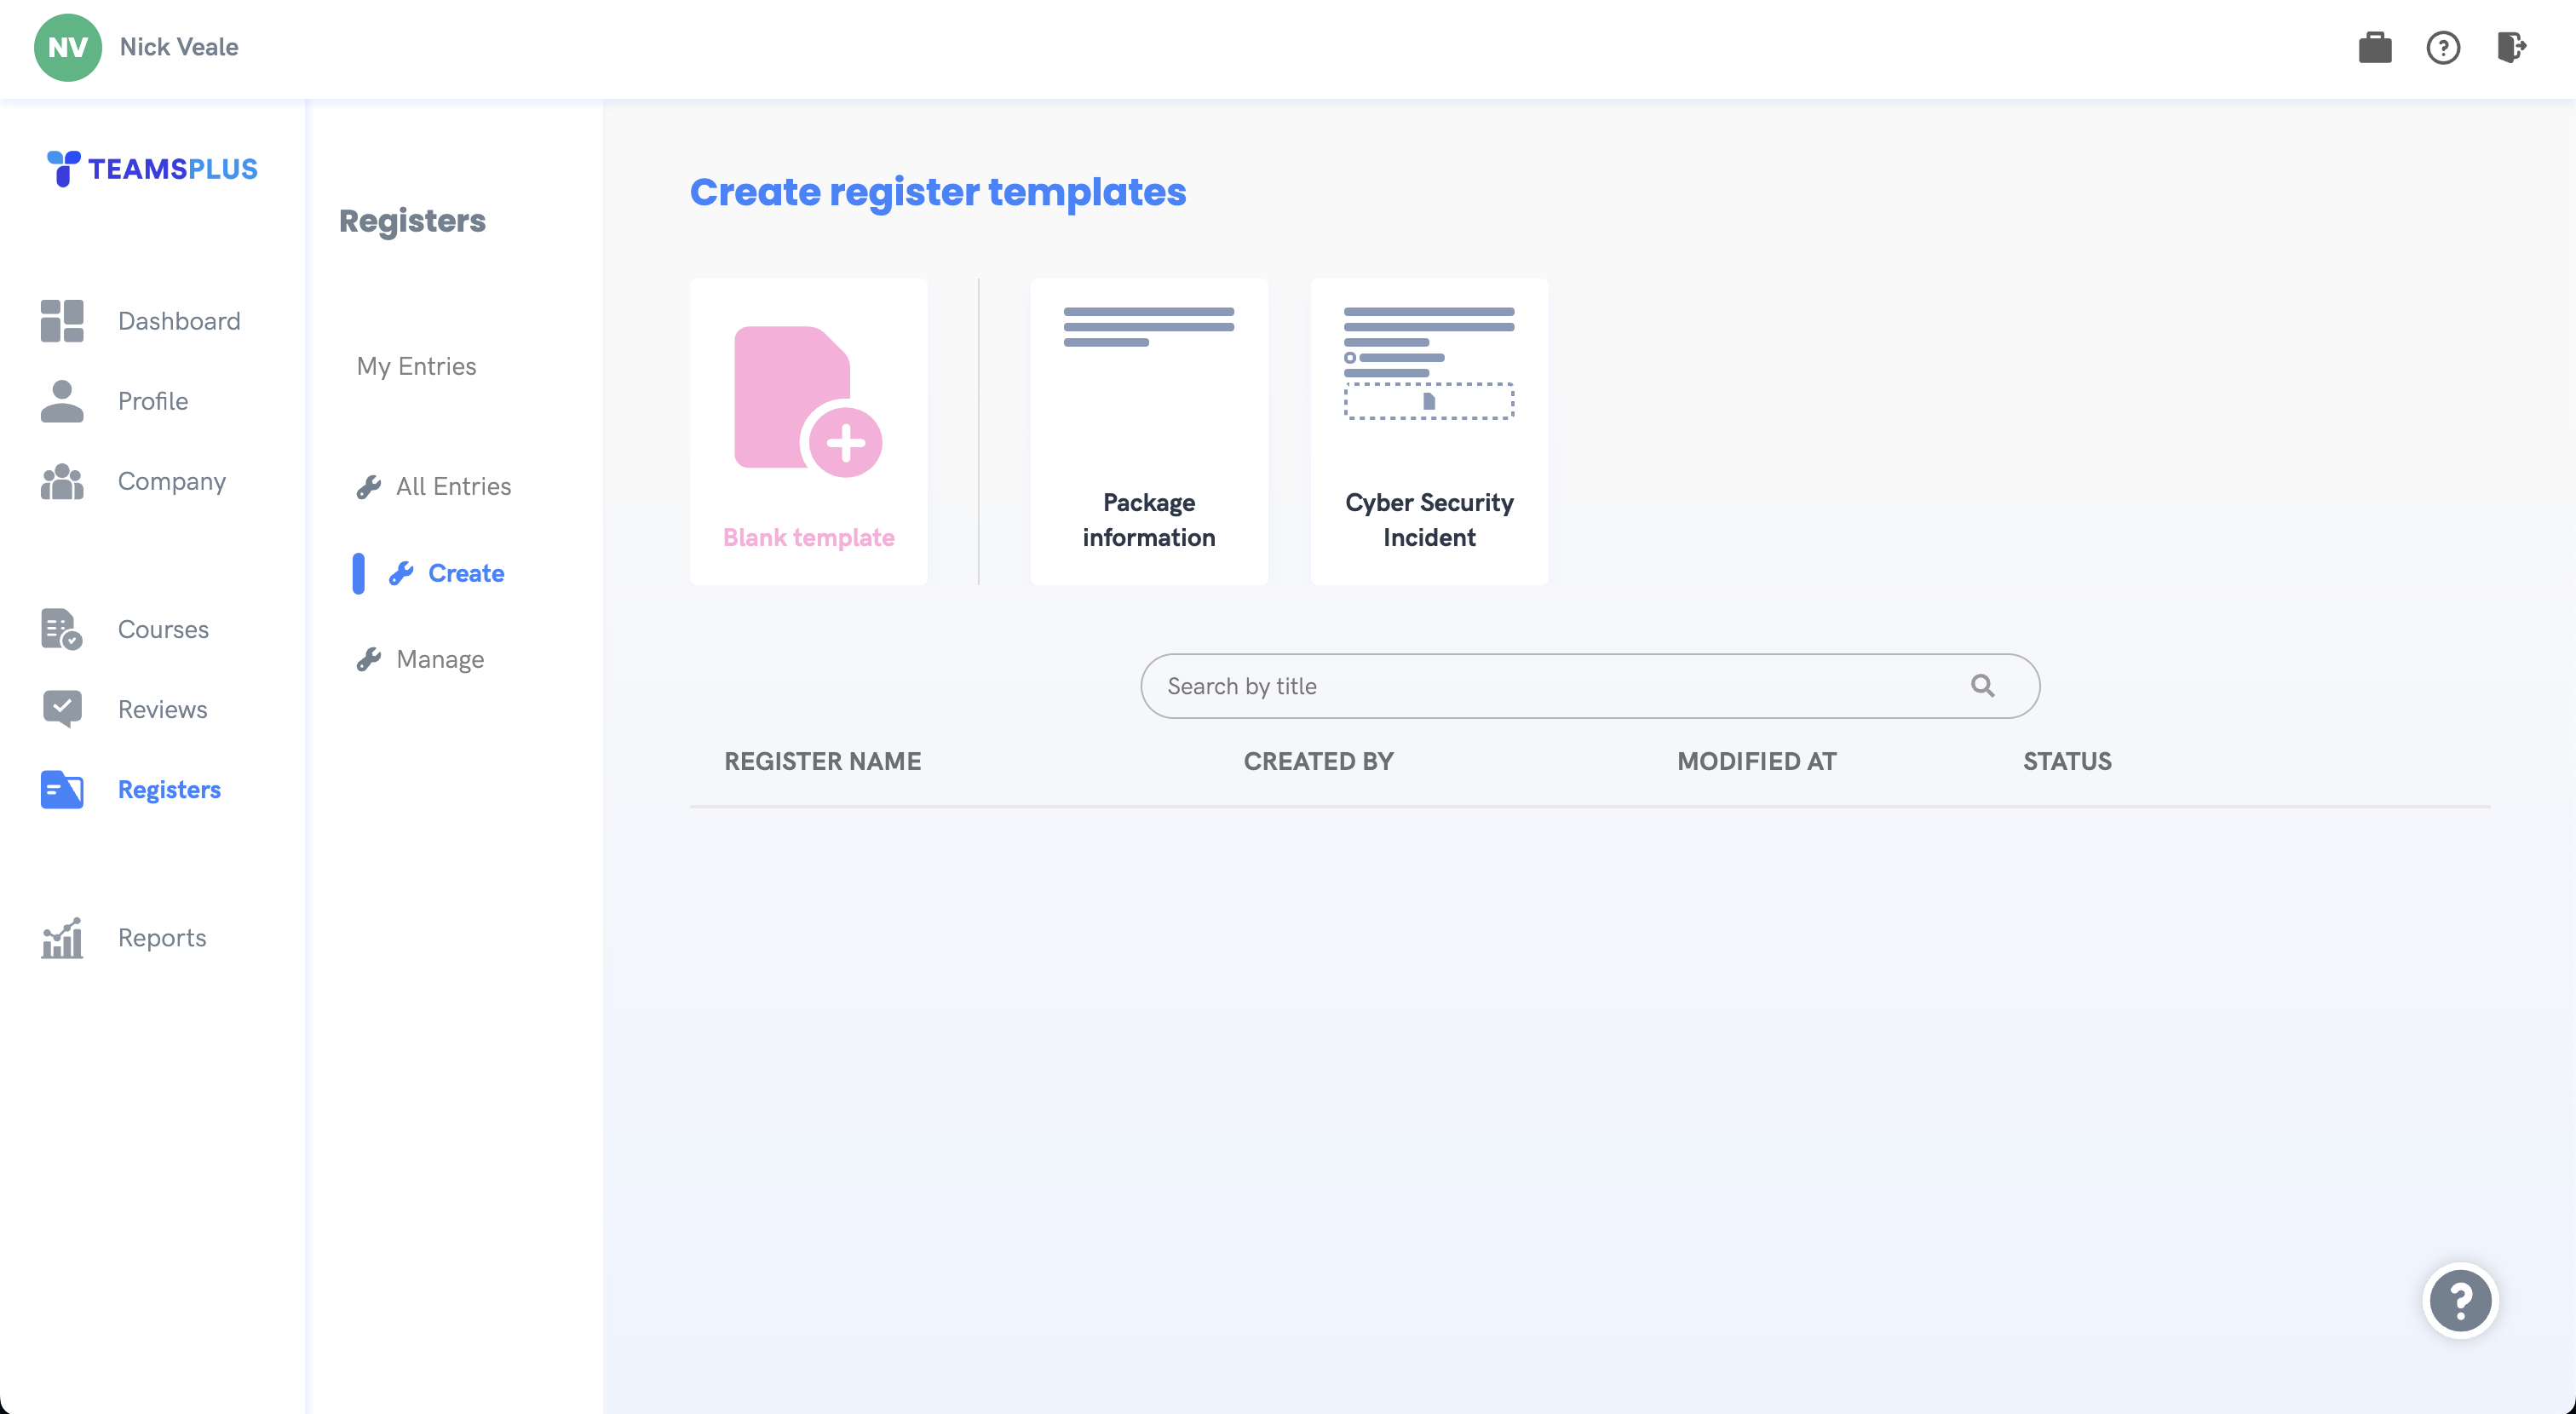
We can either create a blank template, or base our template off an existing or provided template. Let's select blank so we can see what the process is like from scratch.
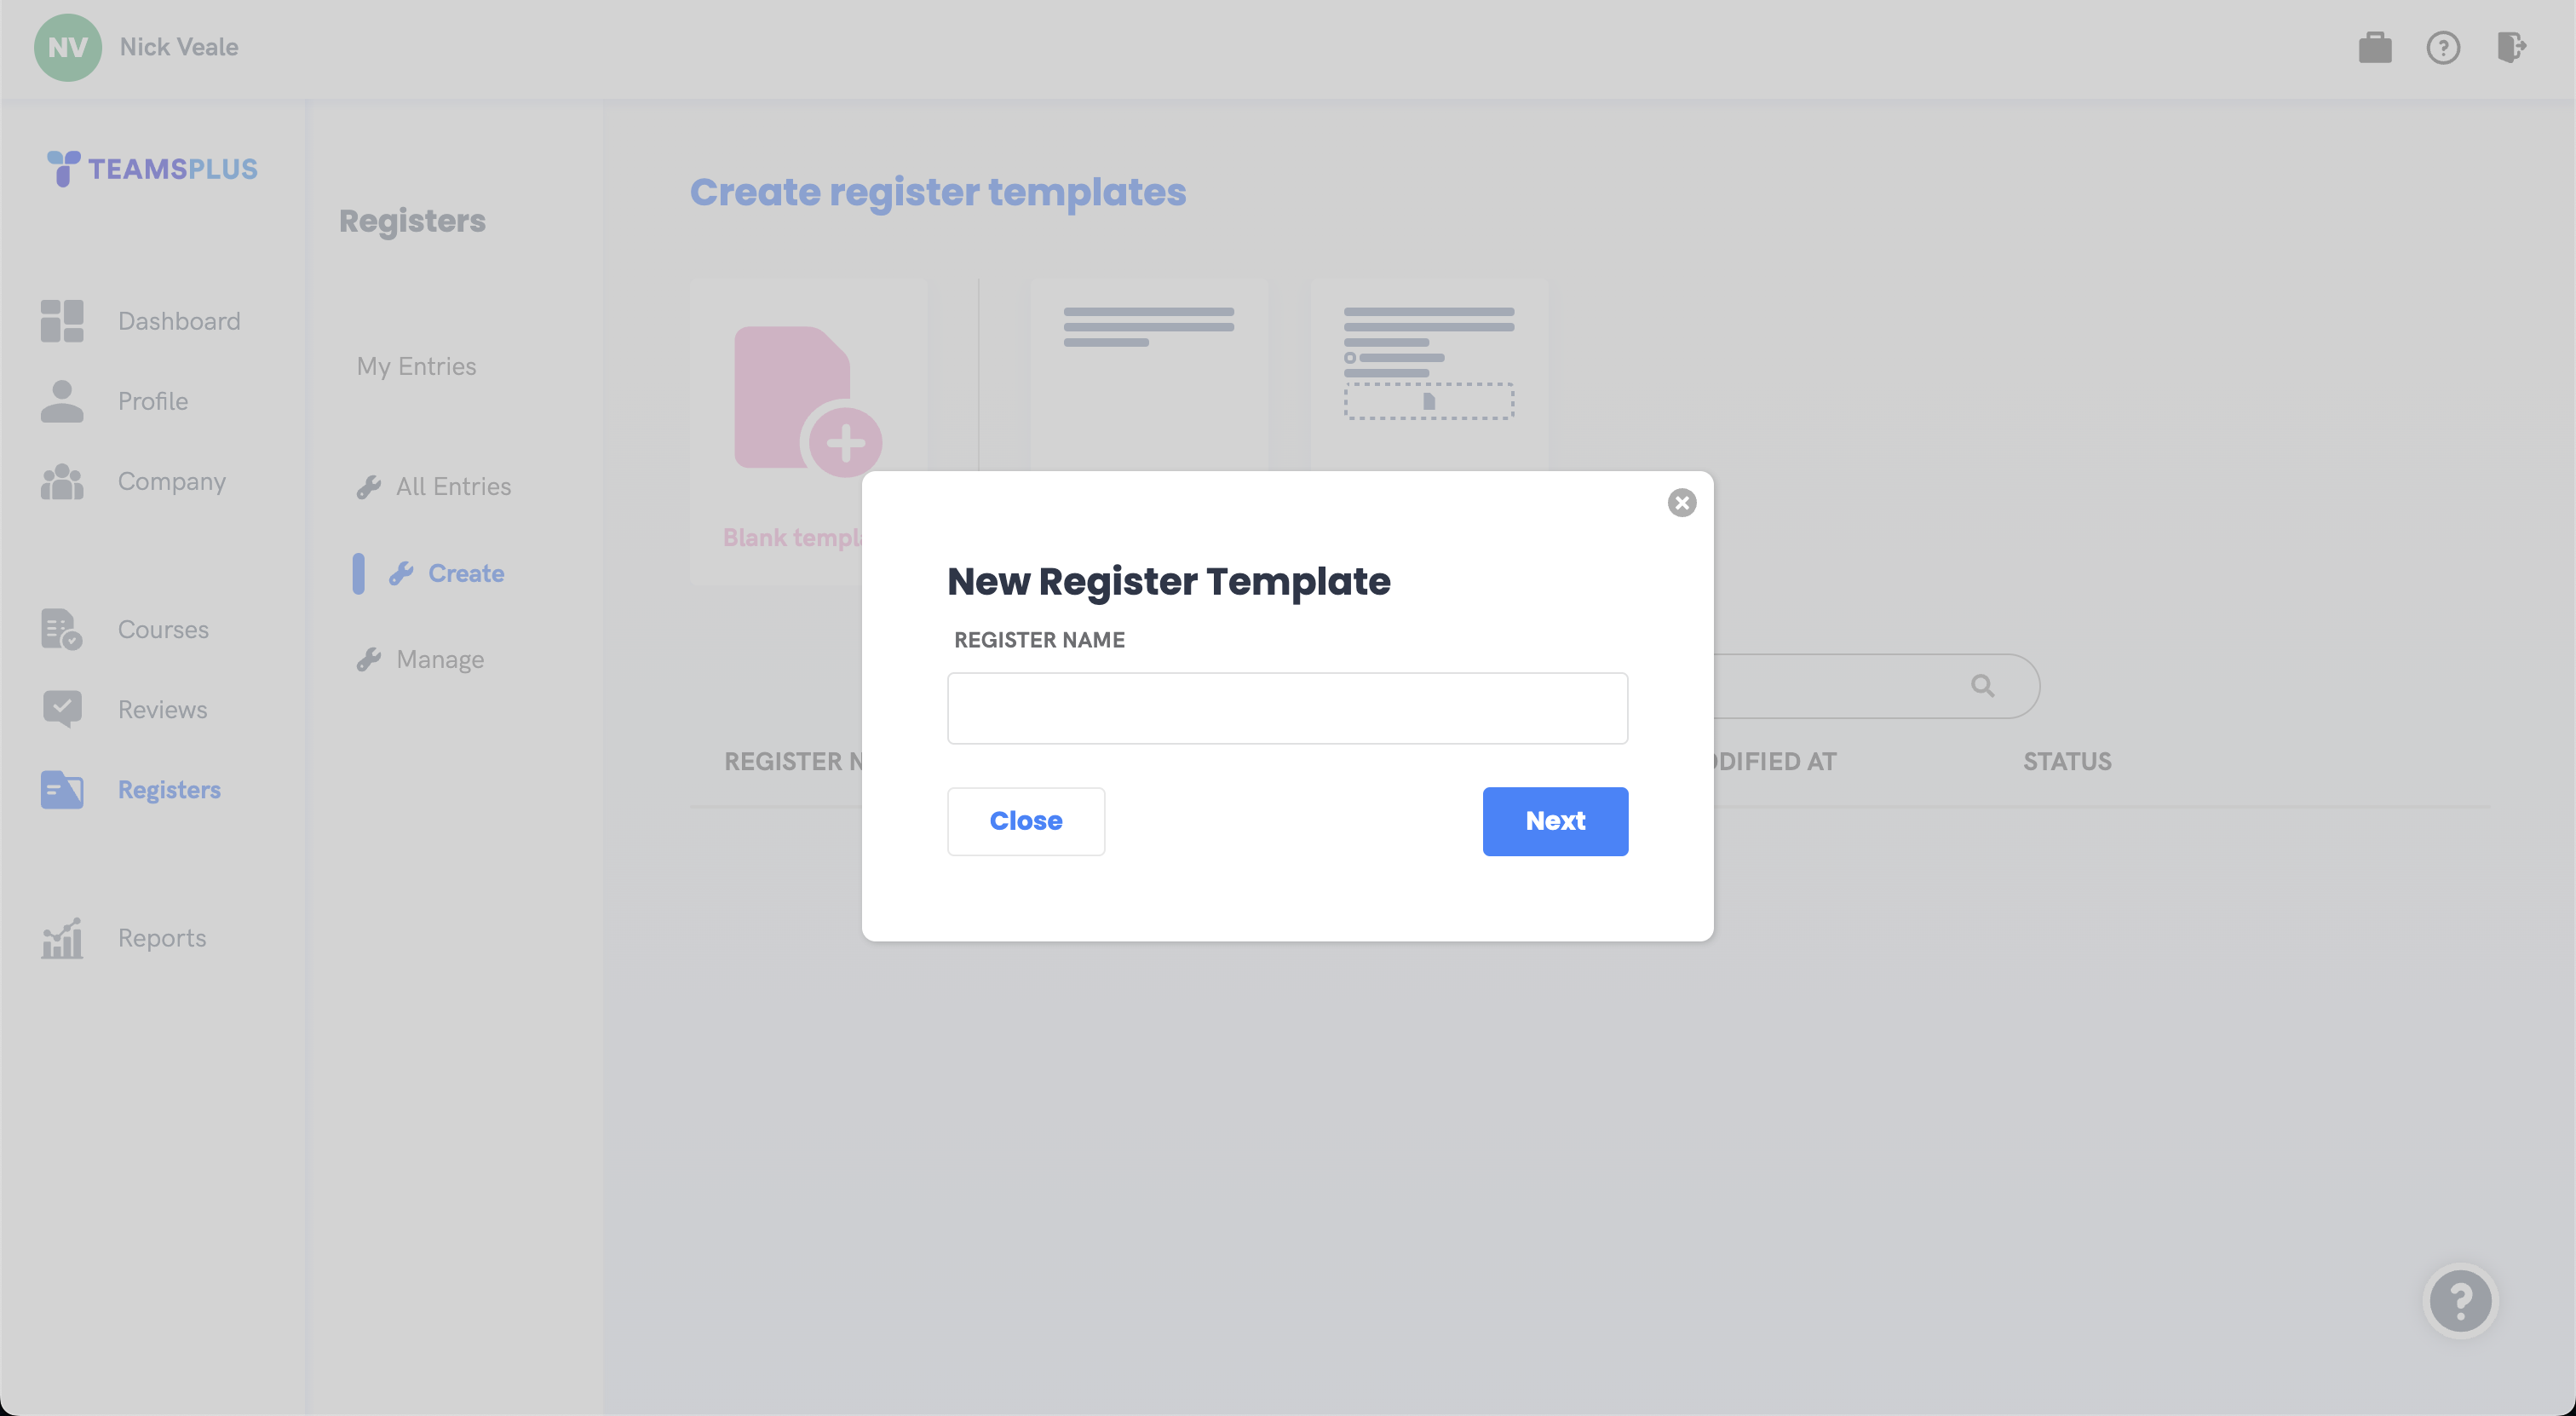
Here we will add a name for our new template before clicking next.
This will take us to the template editor, where we can add fields for user input into the register.
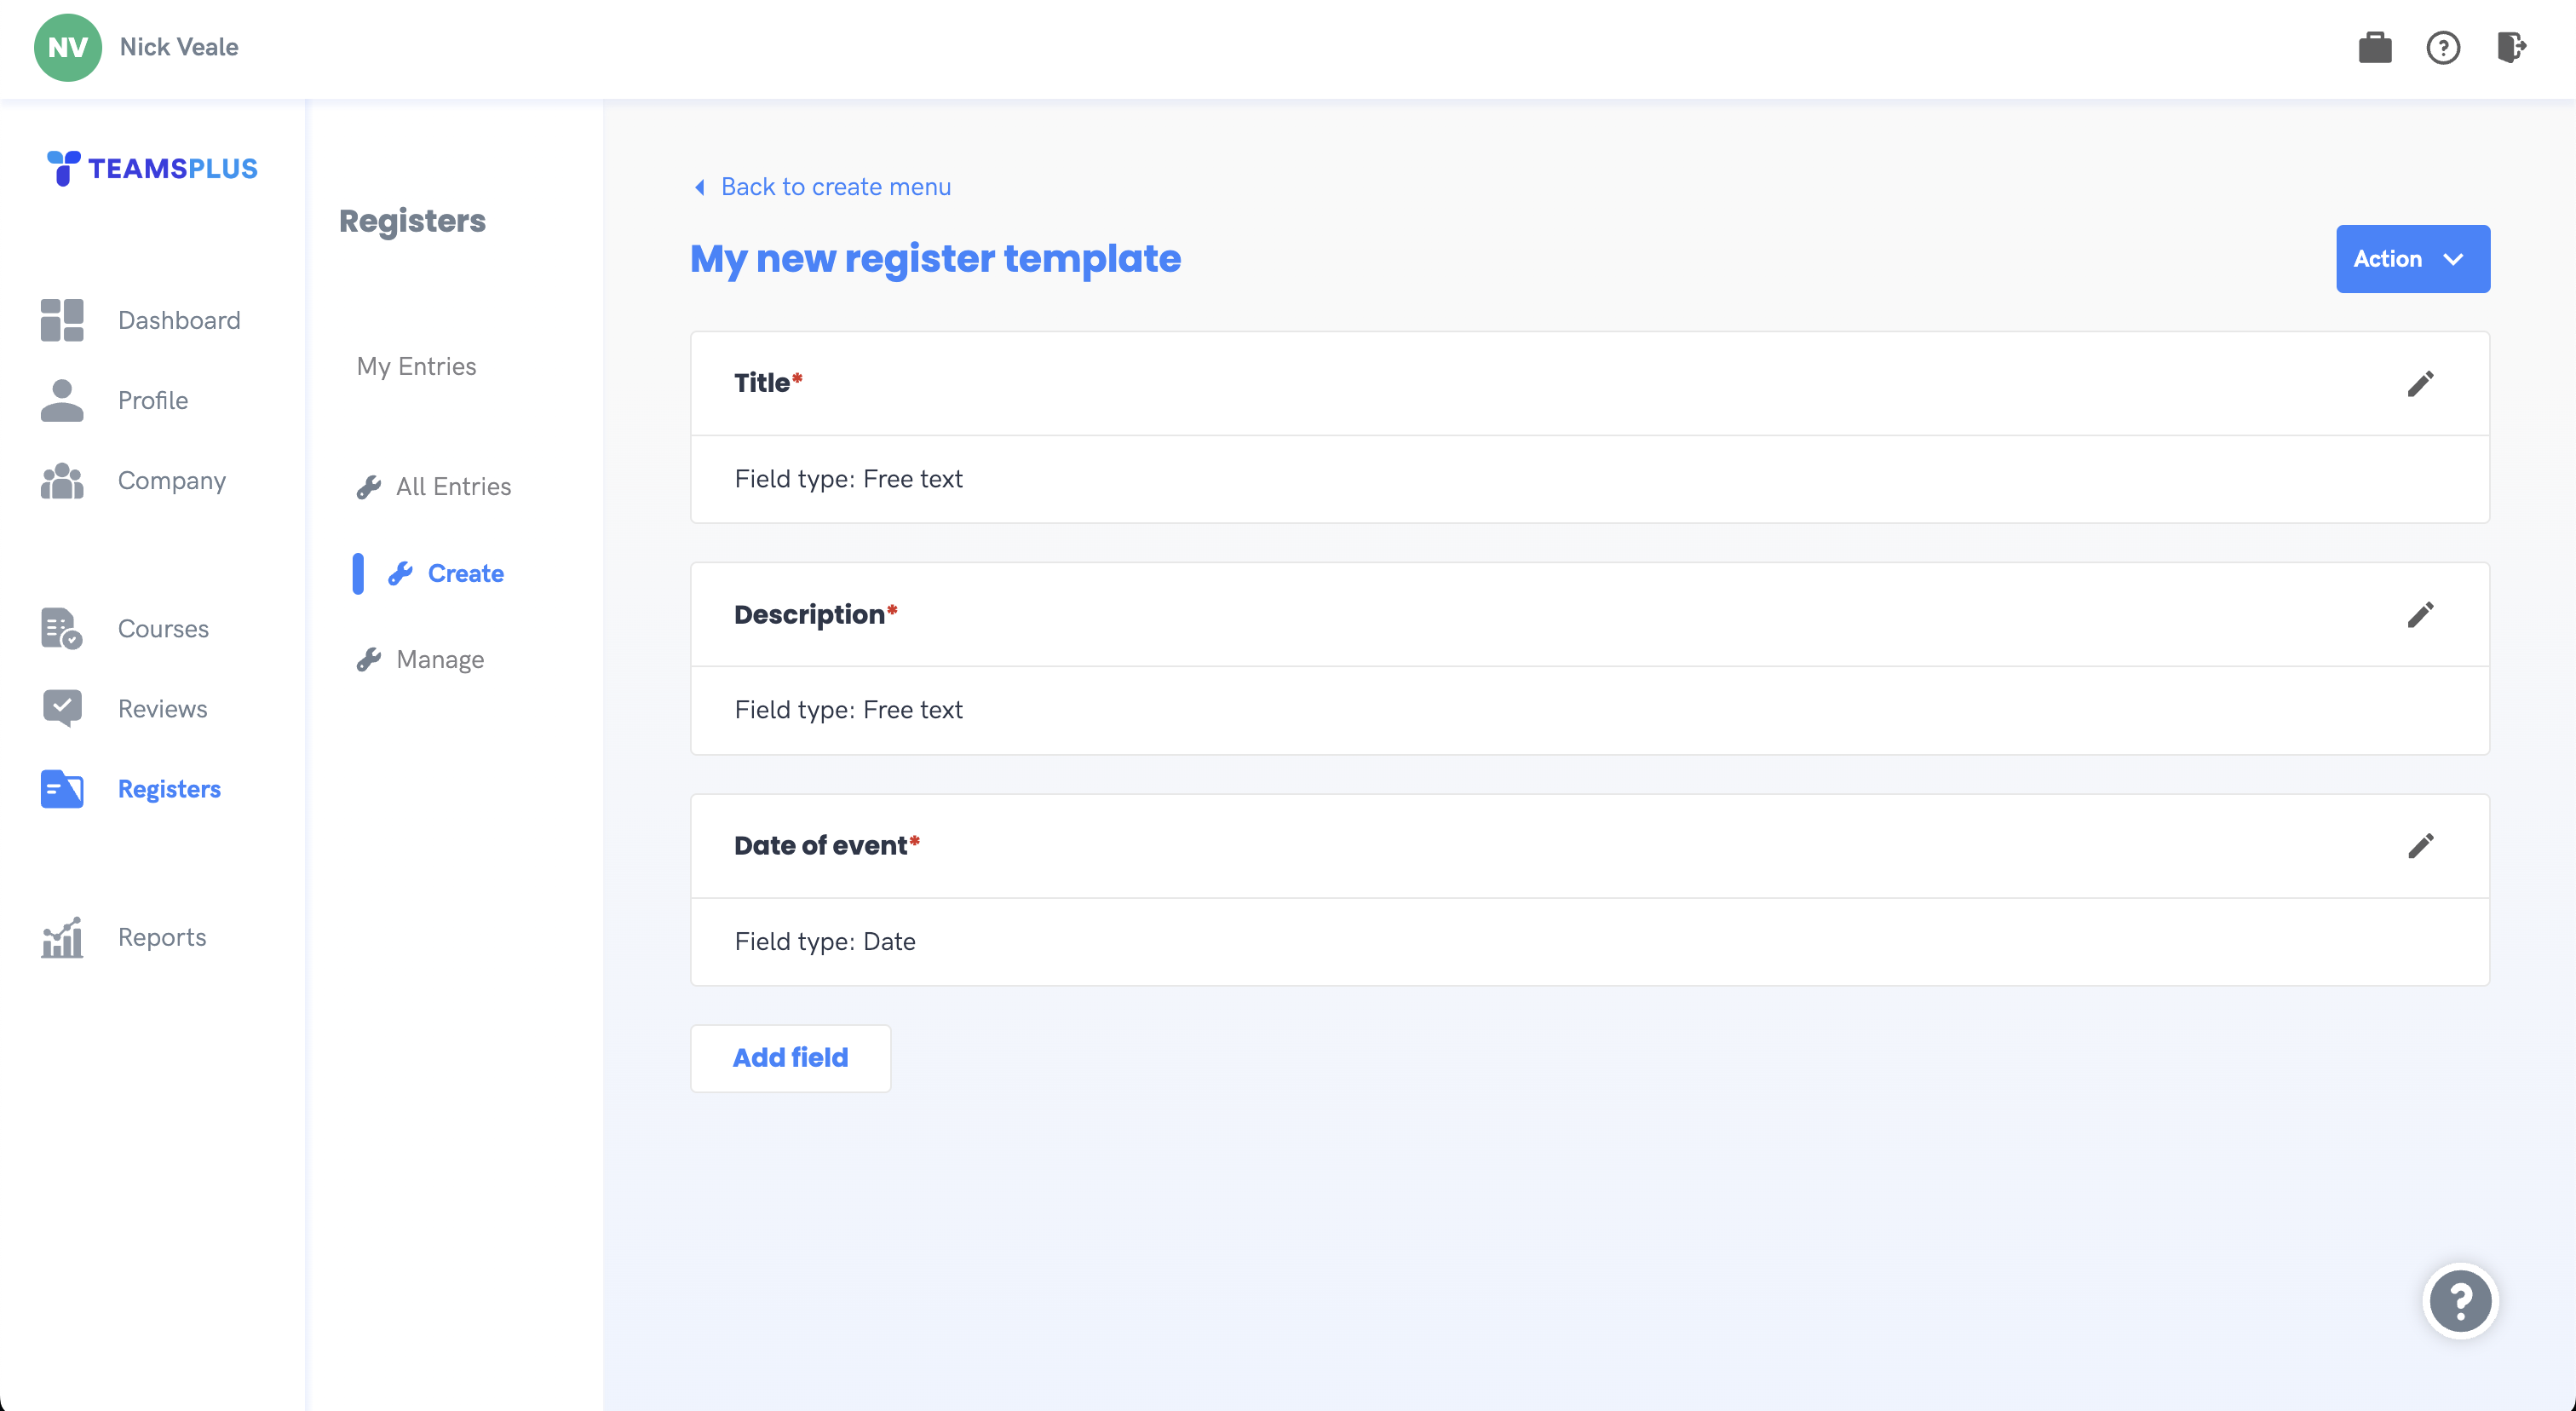
Every register template is required to have 3 fields ...
1. Title 2. Description 3. Date of event
By default these are created for you. It is recommended that you rename these three fields to reflect what the template will be used for. For example, if this was for a cyber security event, you might make the three fields 'Type of Incident', 'Description of Cyber Security Incident', and 'Date of first notice'.
You can also add additional fields if need be. The types of these fields can include the following options.
Free text
Provides a text input box to the user.
File upload
Allows the user to upload additional files or evidence to support the register entry.
Date
Additional date input.
Checkbox
A single tick box with the title as text next to the checkbox. Intended for yes or no questions.
You can choose whether or not to make the field required by ticking the 'required' checkbox. If you have set the type of the field to be 'Checkbox', then ticking the 'required' field will mean the user MUST tick the checkbox to submit the form. This can be useful for legal requirement fields such as 'The knowledge I have presented is to my knowledge truthful and correct'.
After you are happy with your template, you can activate it via the Action menu in the top right. Before activating, make sure that you've clicked 'save' on each field.
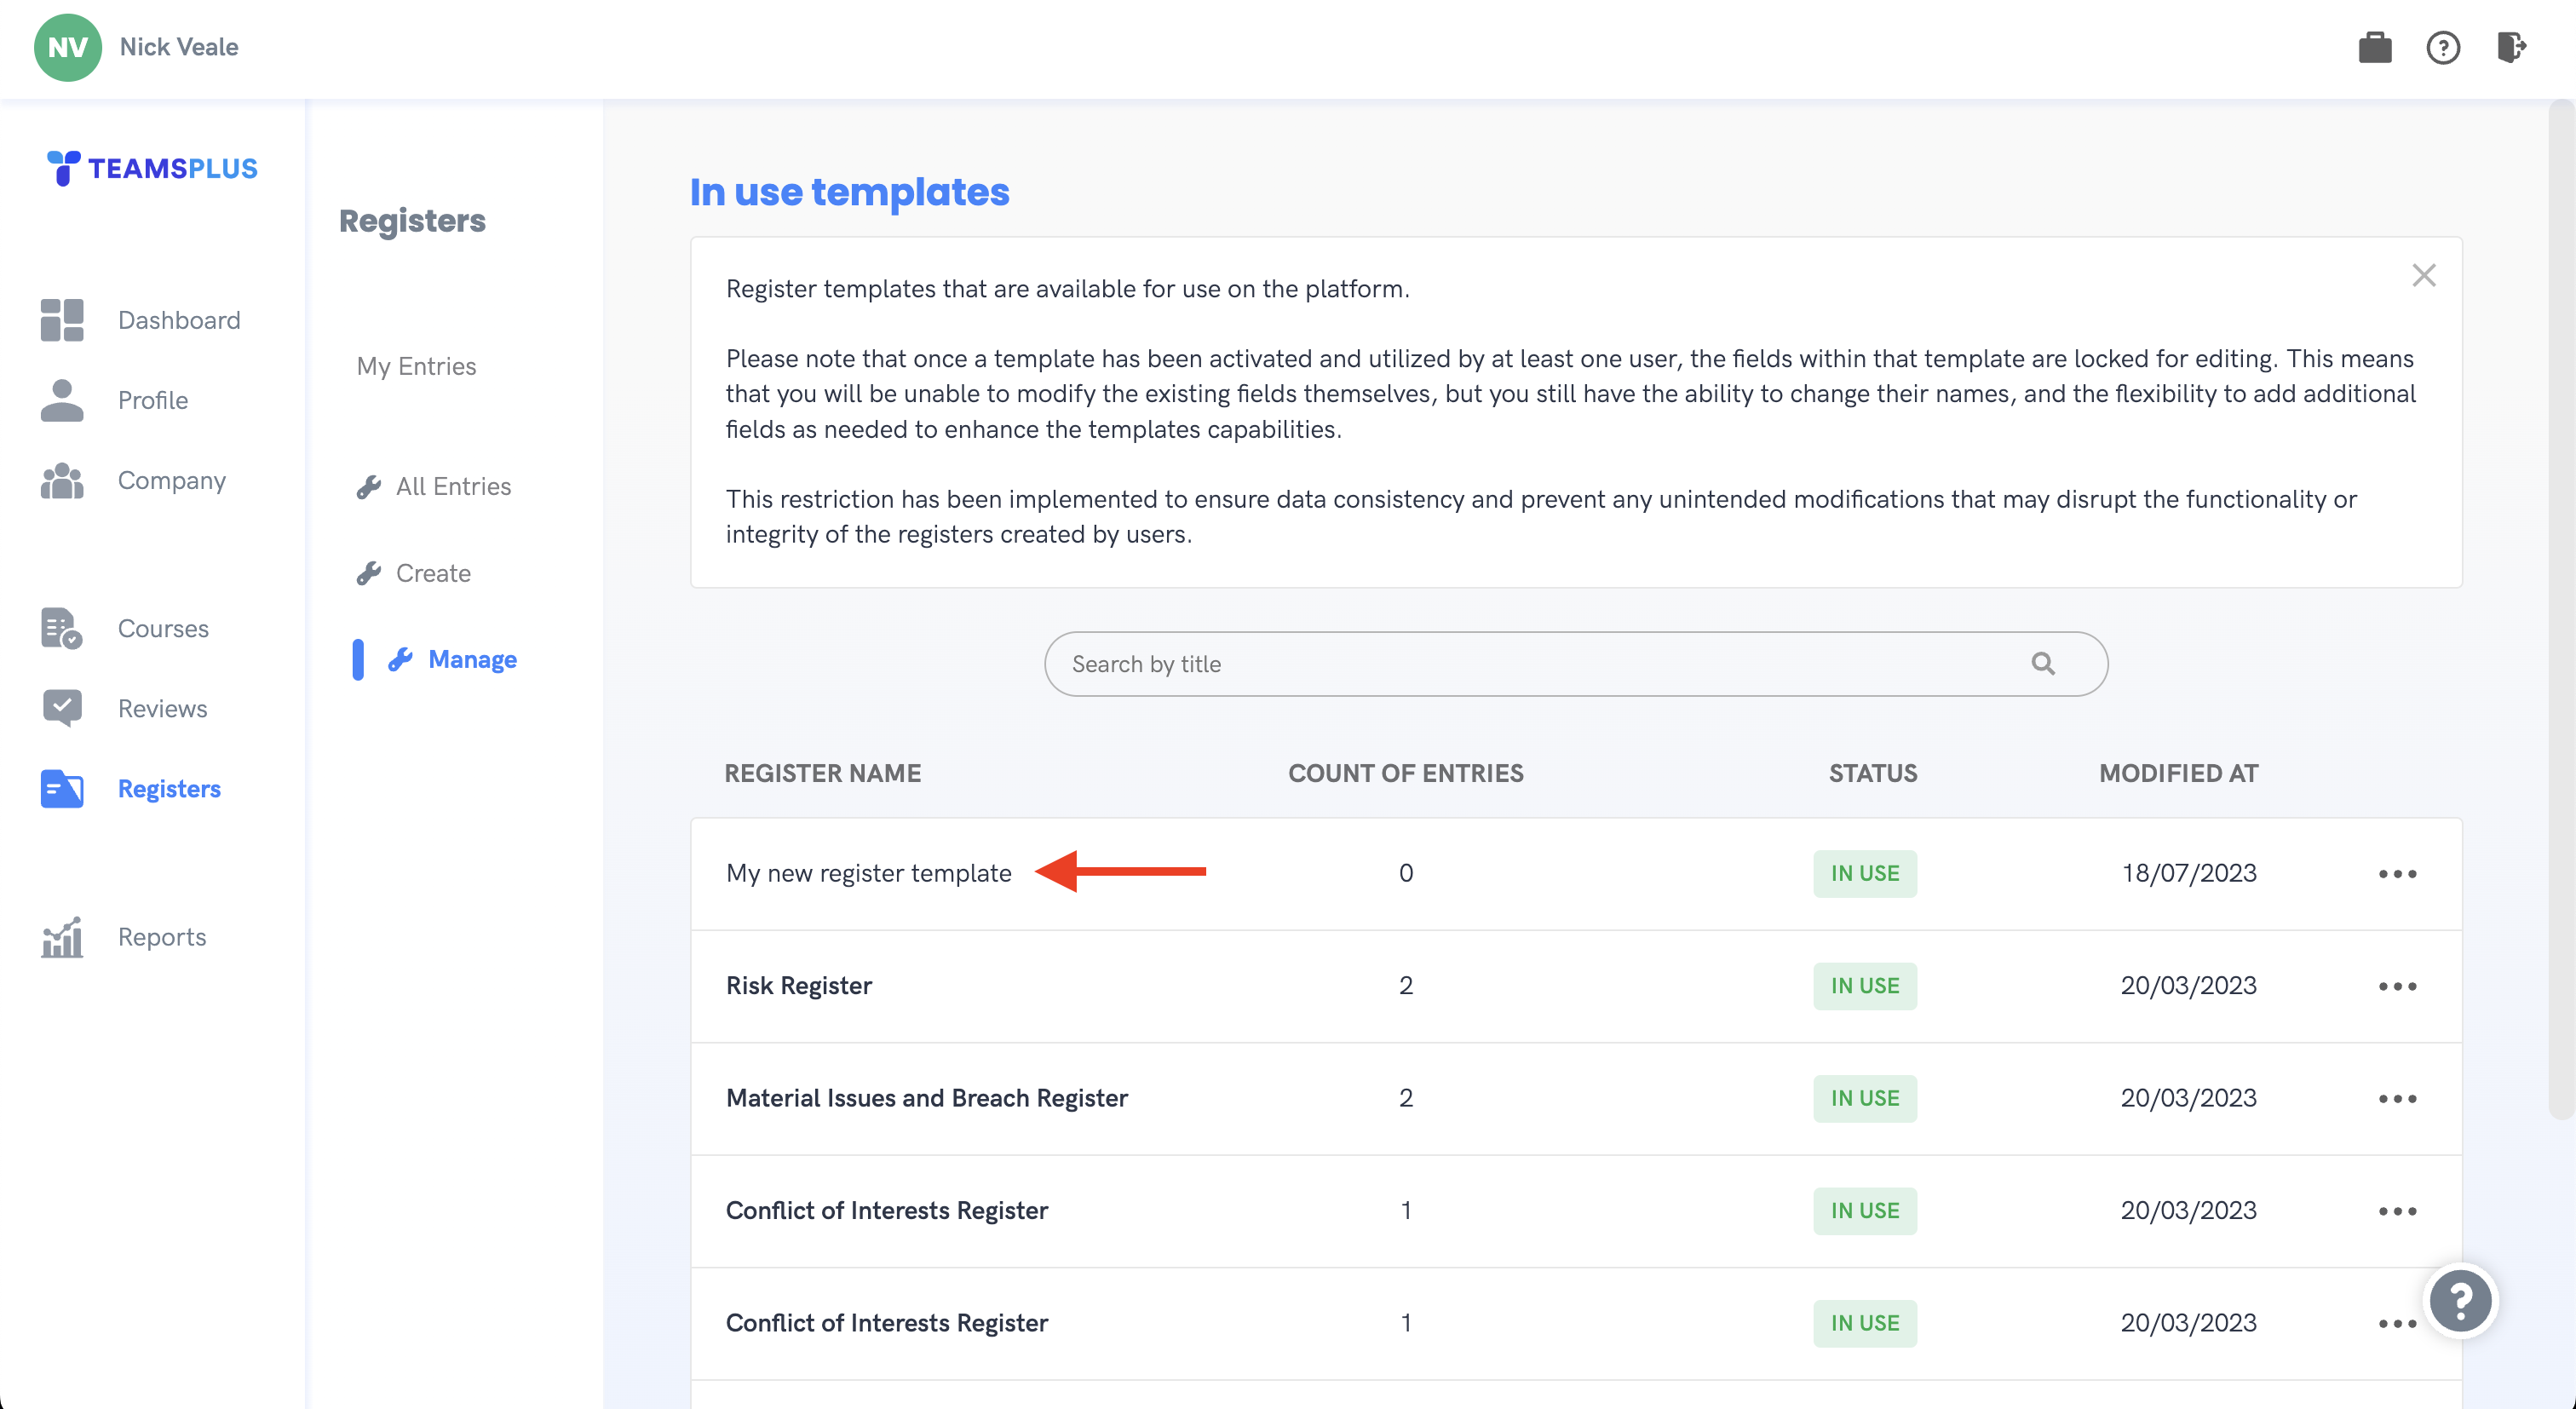
Note: Once an active template has been used by at least one register, deleting and editing your current fields will be prohibited, and you will only be able to add additional fields. This is to ensure the integrity of registers between templates.
After your template has been activated, you will see it in 'Manage' area, and it will be made available for users to create entries with via the 'My Entries' menu.
All entries that users create will be visible from the 'All entries' menu.